Why am I so dizzy after my whiplash?

Migrane

Whiplash, or better termed “Whiplash Associated Disorders” (WAD), is a condition that carries multiple signs and symptoms ranging from neck pain and stiffness to headache, confusion, ringing in the ears, and more. But can WAD cause dizziness? Let’s take a look!

Dizziness is a general term that is used rather loosely by the general population. We’ve all experienced dizziness from time-to-time that is considered “normal,” such as standing up too quickly or while experiencing a rough flight.

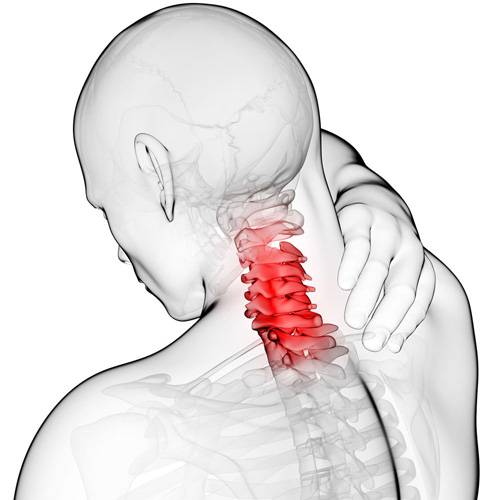
Often, dizziness and problems with balance go hand in hand. There are three main organs that control our balance: 1) the vestibular system (the inner ear); 2) the cerebellum (lies in the back of the head); and, 3) the dorsal columns (located in the back part of the spinal cord). In this article, we will primarily focus on the inner ear because, of the three, it’s unique for causing dizziness. Our vision also plays an important role in maintaining balance, as we tend to lose our balance much faster when we close our eyes.

It’s appropriate to first discuss the transient, usually short episode of “normal” lightheadedness associated with rising quickly. This is typically caused by a momentary drop in blood pressure, and hence, oxygen simply doesn’t reach the brain quick enough when moving from sitting to standing. Again, this is normal and termed “orthostatic hypotension” (OH).

However, OH can be exaggerated by colds, the flu, allergy flair-ups, when hyperventilating, or at times of increased stress or anxiety. OH is also associated with the use of tobacco, alcohol, and/or some medications. Bleeding can represent a more serious cause of OH such as with bleeding ulcers or some types of colitis, and less seriously, with menstruation.

The term BPPV or benign paroxysmal positional vertigo, has to do with the inner ear where our semicircular canals are located. The canals lie in three planes and give us a 3D, 360º perspective about where we are in space. The fluid flowing through these canals bends little hair-like projections, which are connected to sensory nerves that tell the brain about our spatial position. If the function of these canals is disturbed, it can mix-up the messages the brain receives, thus resulting in dizziness. Exercises are available on the Internet that can help with BPPV (look for Epley’s and Brandt-Daroff exercises).

DANGEROUS causes of dizziness include: HEART – fainting (passing out) accompanied by chest pain, shortness of breath, nausea, pain or pressure in the back, neck, jaw, upper belly, or in one or both arms, sudden weakness, and/or a fast or irregular heartbeat.

STROKE – sudden numbness, paralysis, or weakness in the face, arm, or leg, especially if only on one side of the body; drooling, slurred speech, short “black outs,” sudden visual changes, confusion/difficulty speaking, and/or a sudden and severe, “out of the ordinary” headache. CALL 911 (or the number for emergency services if you’re outside the Canada) if you suspect you may be having a heart attack or stroke!

Food Myth #6: Energy Drinks Are Better Than Soda

nitrousmonster

Red Bull, Monster and their brethren aim to give you a bump in energy with a giant dose of sugar, B vitamins, caffeine and “herbal extracts”. I’d imagine you’re already thinking “this sounds like a bad thing that I should avoid” but in case you aren’t…..

A 16 ounce can of this stuff packs a whopping 280 (!) calories of SUGAR in it which is about 80 calories more than the same sized serving of Pepsi or Coke. Still drinking this stuff? Great, I’ll pass along a few dentist contacts as well since a University of Maryland study showed that they are also 11% more corrosive on your teeth than soft drinks.

Drink more water, tea, black coffee and avoid anything with EXTREME or NEON on the can and you’ll be fine…….


The Best Piece Of Fitness Gear?

Screen Shot 2017-11-15 at 4.02.58 PM.png

For my money I still believe that the classic TRX suspension trainer is the best piece of fitness equipment out there. Easy to use, super effective, safe, compact and scalable. All fitting into a little bag you can throw in your backpack or purse to take with you.

We have kids as young as 7 using it (my kids want to “work out” with us but are too young for weights, kettlebells and treadmills. The TRX is a great way to have them as part of your fitness routine in a safe way) and adults in their 70’s too (both my parents use the TRX to stay strong and limber in the retirement years).

With dozens of exercises and workouts at your disposal online you’ll never get bored and never find it “too easy”.

Check out the original TRX and all their cool accessories here:

TRX® Suspension Trainers


Feels just like Carpal Tunnel but isn’t Carpal Tunnel……

Your Median Nerve begins in your neck and travels down your arm on its way to your hand. This nerve is responsible for sensation on the palm side of your first 3 ½ fingers and also controls some of the muscles that flex your fingers. The median nerve can sometimes become entrapped near your elbow as it travels through a muscle called the “pronator teres”. Compression of the median nerve by the pronator muscle is called “Pronator Syndrome.”

Pronator syndrome is often brought on by prolonged or repeated wrist and finger movements, i.e., gripping with the palm down. Carpenters, mechanics, assembly line workers, tennis players, rowers, and weight lifters are predisposed to this problem. The condition is more common in people with excessively developed forearm muscles and is also more common in your dominant arm. Pronator syndrome most often affects adults age 45-60 and females are affected about four times more frequently than males. People who suffer from diabetes, thyroid disease, and alcoholism have an increased risk for developing pronator syndrome.

Pronator syndrome produces symptoms very similar to a more common cause of median nerve compression called “carpal tunnel syndrome”. Symptoms of pronator syndrome include numbness, tingling, or discomfort on the palm side of your thumb, index, middle finger, and half of your ring finger. The discomfort often begins near the elbow and radiates toward your hand. Your symptoms are likely aggravated by gripping activities, especially those that involve rotation of the forearm, like turning a doorknob or a screwdriver. Unlike carpal tunnel syndrome, pronator syndrome symptoms are not generally present at night. You may sometimes feel as though your hands are clumsy. In more severe cases, hand weakness can develop.

To help resolve your condition, you should avoid activities that involve repetitive hand and forearm movements. Perhaps the most important aspect of your treatment plan is to avoid repetitive forceful gripping. You may apply ice packs or ice massage directly over the pronator teres muscle for ten minutes at a time or as directed by our office. In some cases, an elbow splint may be used to limit forearm movements. If left untreated, pronator syndrome can result in permanent nerve damage. Fortunately, our office has several treatment options available to help resolve your symptoms.

Lumbar Spine Stabilization

L Spine Stabilization

This is a great way to increase the stability of your lower back.

  1. Lie with your stomach over a therapeutic ball while stabilizing yourself with your feet and arms and keep your head in line with your body.
  2. Tighten your abdominal muscles to flatten the spine by pulling your belly button towards your back and hold the contraction throughout the exercise.
  3. Bend one knee and lift it up towards the ceiling.
  4. Lower the leg and repeat on the other side.


CTS at Night.

For those who have carpal tunnel syndrome (CTS), it’s no surprise that CTS is frequently most expressive during the night, often to the point of interrupting sleep and/or making it difficult to fall back to sleep. So why is that?

The primary reason for nighttime CTS symptoms has to do with the wrist, as it is very difficult to sleep with the wrist held in its “ideal” or least irritating position. In fact, most people favor “curling” the back of the hand under the chin or bending the hand/wrist backwards under the head. When the wrist is bent in either direction, it can increase the pressure inside the wrist, which can generate the various symptoms associated with CTS.

One study evaluated the pressure inside the carpal tunnel while participants slowly moved their wrists. The researchers found many movements didn’t need to exceed 20 degrees before the pressure increased enough within the carpal tunnel to generate symptoms.

Because it doesn’t take a lot of movement to build up excessive pressure in the wrists of those with CTS, many doctors recommend the use of a “cock-up splint” for the non-surgical treatment of CTS in order to help keep the wrist in a neutral position.

Wrist posture is also an important factor during the day. One study looked at typing on a tablet PC, which allowed people to work in non-traditional settings. As screen size reduced, the posture required to type became more limited and accelerated the usual rate of pain onset in the neck, elbows, and wrists.

This study also looked at three different positions used when working on touch-screen devices: desk, lap, and bed. The healthy subjects completed six, 60-minute typing sessions using three virtual keyboard designs: standard, wide, and split. The researchers monitored the position of the wrist, elbow, and neck while the participants typed and followed up each session with questionnaires designed to measure discomfort.

The research team reported that typing in bed required greater wrist extension but resulted in a more natural elbow position than typing at a desk. The angled split keyboard significantly reduced the wrist deviation vs. the standard or wide keyboard designs. All three regions—the neck, elbow, and wrist—exhibited more movements (13% to 38%) towards the end of the one hour sessions, which correlated with a significant increase in pain in every body region investigated. Overall, using a wider keyboard while sitting at a desk was the most tolerable position among study participants.


176

How can I calm down my WAD symptoms?

Cervical Strain

Whiplash is really a slang term for the rapid back and forth whipping of the head on the neck, usually associated with motor vehicle accidents. The title “Whiplash Associated Disorders”, or WAD, describes it best because it includes ALL of the MANY signs and symptoms of the disorder.

WAD basically comes in three sizes based on the degree of injury. A WAD I is present when there is pain but no physical examination findings; WAD II occurs when there are exam findings but no neurological loss (numbness or weakness); and WAD III includes loss of neurological function.  There is also a separate WAD level that includes fractures and dislocations (WAD IV).

There are many things that can be done by the patient to assist in the healing process for WAD. The first well-studied recommendation is to “continue with your usual activities.” Try to keep active and not change your routine. The good news is that WAD (especially types I and II) usually resolves without complication, and recovery is even more likely to occur if you don’t deviate much from your routine.

For those whose symptoms are more severe and/or not resolving, mobilization and manipulation of the neck and back are very effective treatment options. In addition to treatments you’d receive in a chiropractic office, there are MANY things you can do at home as “self-help strategies.” Some of these include (“PRICE”):

1)  PROTECT: Though it’s important to continue with your usual daily activities, this is dependent on both the degree of tissue injury and your pain tolerance. So do as many of your usual daily activities as possible, but AVOID those that result in a sharp, lancinating type of pain or those where recovery from the pain is delayed.  Therefore, this category may require modifying your ADLs (activities of daily living). A cervical collar (hard orsoft) should NOT to be used UNLESS you have an unstable injury (fracture or a grade III sprain).

2)  REST: Doing too much is like picking at a cut (which can delay healing) and doing too little can lead to a delayed healing response as well. Staying within reasonable pain boundaries is a good guide.

3) ICE > HEAT: Ice reduces swelling, and your doctor will typically recommend it over applying heat, especially on a recent injury. Heat draws fluids in, and while it may feel good, it can make your symptoms worse.

4)  COMPRESS: We can basically ignore this when referencing neck pain. This pertains better to wrapping an ankle, knee, wrist, or elbow with an elastic compression orthotic or brace.

5)  ELEVATE: This too is meant for the acute stages of an extremity injury like a foot or ankle.

Exercises unique for neck pain in the acute, subacute, and chronic stages of healing are perhaps the most important of the self-help approaches. In the ACUTE phase, try these…

1)  Range of Motion: Once again, stay within “reasonable pain boundaries” as you move your head forwards, backwards, side to side, and rotate left and right. These can be done either with or without LIGHT resistance applied using one or two fingers placed against your head. Limit the repetitions to three slow reps in each direction and emphasize the release of the movement.

2)  Chin/head Glides: Tuck in the chin (think of creating a double or triple chin) followed by poking the chin/head out.

In the SUBACUTE and CHRONIC phases of healing, the importance of strengthening the deep neck flexors cannot be over emphasized. Please refer to last week’s article for a description of this (see #3 of the 6 recommendations listed).

Our Exercise Of The Month: Dead Bug

Begin lying on your back with your right arm reaching overhead and your left leg flat on the table. Your right knee should be bent 90 degrees and your hip 45 degrees. Place your left wrist beneath your back to prevent your back from flattening against the ground. Slowly begin by raising your left knee and right arm at the same time until your hand touches your knee. Be sure not to lift your head or allow your spine to flatten against the floor. Return to the start position and repeat for three sets of 10 repetitions on each side, twice per day or as directed.